


球友们好,我是二哥呀。
今天由我来给大家讲一下《技术派是如何整合 Thymeleaf 模版引擎的》,我会结合源码和原理来讲,尤其是 Spring Boot 是如何自动装配 Thymeleaf 模版解析器这块,相信大家看完后,会对这块有更清晰地认知和理解。
虽说现在都前后端分离了,但仍然会在一些特殊的场景下会用到页面模版引擎,比如说邮件发送模板。另外就是,很多时候,后端开发上手前后端分离项目会比较痛苦,因为 Vue 和 React 还是有一定的门槛的。
技术派的用户端之所以会选择不分(第一版),其实就是为了照顾这样一群小伙伴,让大家把注意力放在后端技术栈上,从而减少负重,提升学习效率。
等第一版的教程全部更新完,我们就会着手第二版、第三版的开发,比如说前后端分离、微服务&分布式。
Thymeleaf 是什么
Thymeleaf 是一个优秀的、面向 Java 的 HTML 页面模板,具有丰富的标签语言和函数。在 JSP 被淘汰之后,Thymeleaf 取而代之成为了 Spring Boot 推荐的模板引擎。

Thymeleaf 在有网和没网的环境下都可以正常工作,既能让美工在浏览器中查看页面的静态效果,也能让程序员在服务器查看带数据的动态页面效果。
这是因为 Thymeleaf 支持 HTML 原型,在 HTML 标签里增加额外的属性来达到模板+数据的展示方式。
浏览器在解释 HTML 的时候会忽略未定义的标签属性,所以 Thymeleaf 可以静态地运行;当有数据返回页面时,Thymeleaf 标签会动态地替换静态内容。
下面列举一些 Thymeleaf 常用的表达式、标签和函数。
1)常用表达式
${...}变量表达式*{...}选择表达式#{...}文字表达式@{...}URL 表达式#maps对象表达式
2)常用标签
- th:action 定义服务器端控制器路径。
- th:each 循环语句
- th:field 表单字段
- th:href URL 链接
- th:id div 标签中的 ID
- th:if 条件判断
- th:include 引入文件
- th:fragment 定义代码片段
- th:object 替换对象
- th:src 图片地址
- th:text 文本
- th:value 属性值
3)常用函数
#dates日期函数#lists列表函数#arrays数组函数#strings字符串函数#numbers数字函数#calendars日历函数#objects对象函数#bools布尔函数
想要查看更多 Thymeleaf 表达式、标签、函数等内容,可以到 Thymeleaf 官网:
技术派是如何整合 Thymeleaf 的
第一步,在 paicoding-ui 模块 pom.xml 文件中添加 Thymeleaf 的 stater
<dependency>
    <groupId>org.springframework.boot</groupId>
    <artifactId>spring-boot-starter-thymeleaf</artifactId>
</dependency>
第二步,在 paicoding-web 模块 dev/application-web.yml 文件中添加 Thymeleaf 的配置
spring:
  thymeleaf:
    mode: HTML
    encoding: UTF-8
    servlet:
      content-type: text/html
    cache: false
- mode: 模板模式,通常情况下设置为 "HTML"。
- encoding: 模板文件的字符编码,通常设置为 "UTF-8"。
- servlet.content-type: 在 Servlet 环境中,模板的 content type。一般设置为 "text/html",代表生成的内容是 HTML。
- cache: 是否缓存模板。在开发环境中,通常设置为 false,这样每次修改模板文件后,不需要重启应用就可以看到效果。在生产环境中,通常设置为 true,以提高性能。可参照 prod/application-web.yml
第三步,我们直接来看首页吧,在 IndexController 中添加 index 方法,内容如下。
@GetMapping(path = {"/", "", "/index"})
public String index(Model model, HttpServletRequest request) {
    String activeTab = request.getParameter("category");
    IndexVo vo = indexRecommendHelper.buildIndexVo(activeTab);
    model.addAttribute("vo", vo);
    return "views/home/index";
}
很好理解,当访问首页的时候,返回 “views/home/index” 视图,该视图是一个 Thymeleaf 页面。
第四步,在 paicoding-ui 模块下新建 index.html 文件(文件名对应控制器中 index 方法返回的字符串).
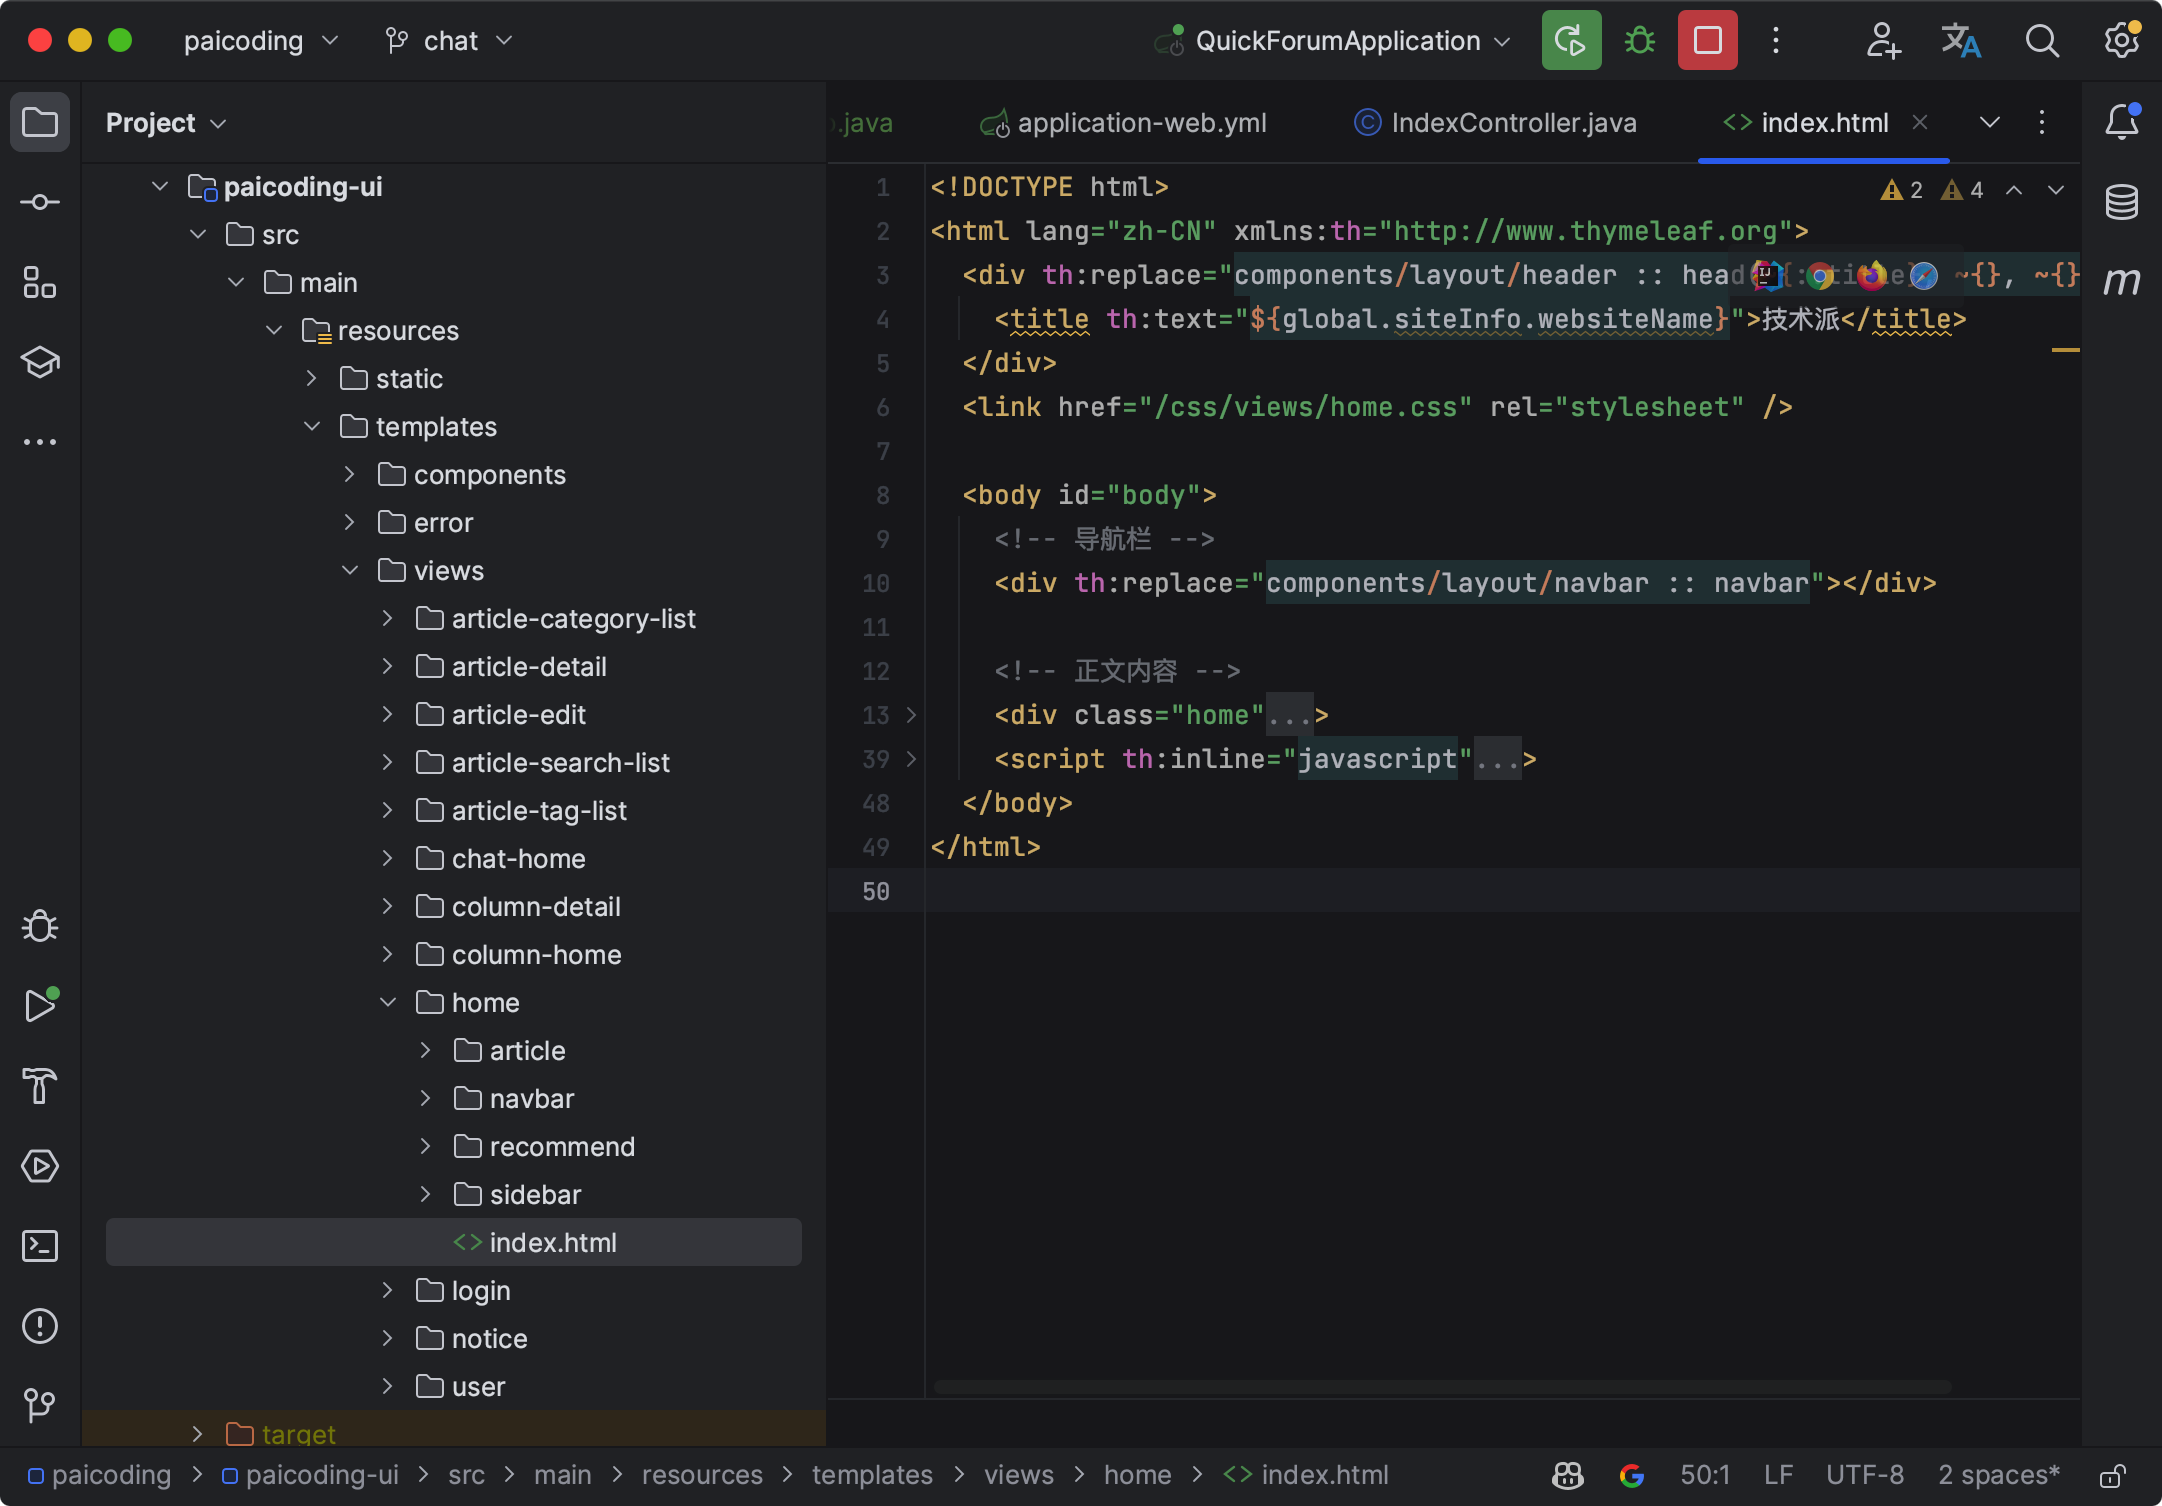
我这里只截个图,大家可以直接去看源码,我来简单解释一下里面用到 Thymeleaf 的几个关键点。
<html lang="zh" xmlns:th="http://www.thymeleaf.org">为 Thymeleaf 的命名空间,通过引入命名空间就可以在 HTML 文件中使用 Thymeleaf 标签语言,用关键字 “th”来标注。- th:replace: 用指定的模板片段替换当前的元素。比如
th:replace="components/layout/header :: head(~{::title}, ~{}, ~{})"就是将当前的 div 元素替换为 components/layout/header 模板中的 head 片段。 - th:text: 设置元素的文本内容。比如
th:text="${global.siteInfo.websiteName}"就是将当前元素的文本内容设置为 global.siteInfo.websiteName 的值。 - th:href: 设置元素的 href 属性。类似的还有 th:src,用于设置元素的 src 属性。
- th:if: 设置元素的条件显示。如果表达式的值为 true,则显示元素,否则不显示。比如
th:if="${!#lists.isEmpty(vo.sideBarItems)}",如果 vo.sideBarItems 不为空,就显示当前元素。 th:inline="javascript"表示下面的 script 标签中包含 Thymeleaf 表达式,需要进行处理。
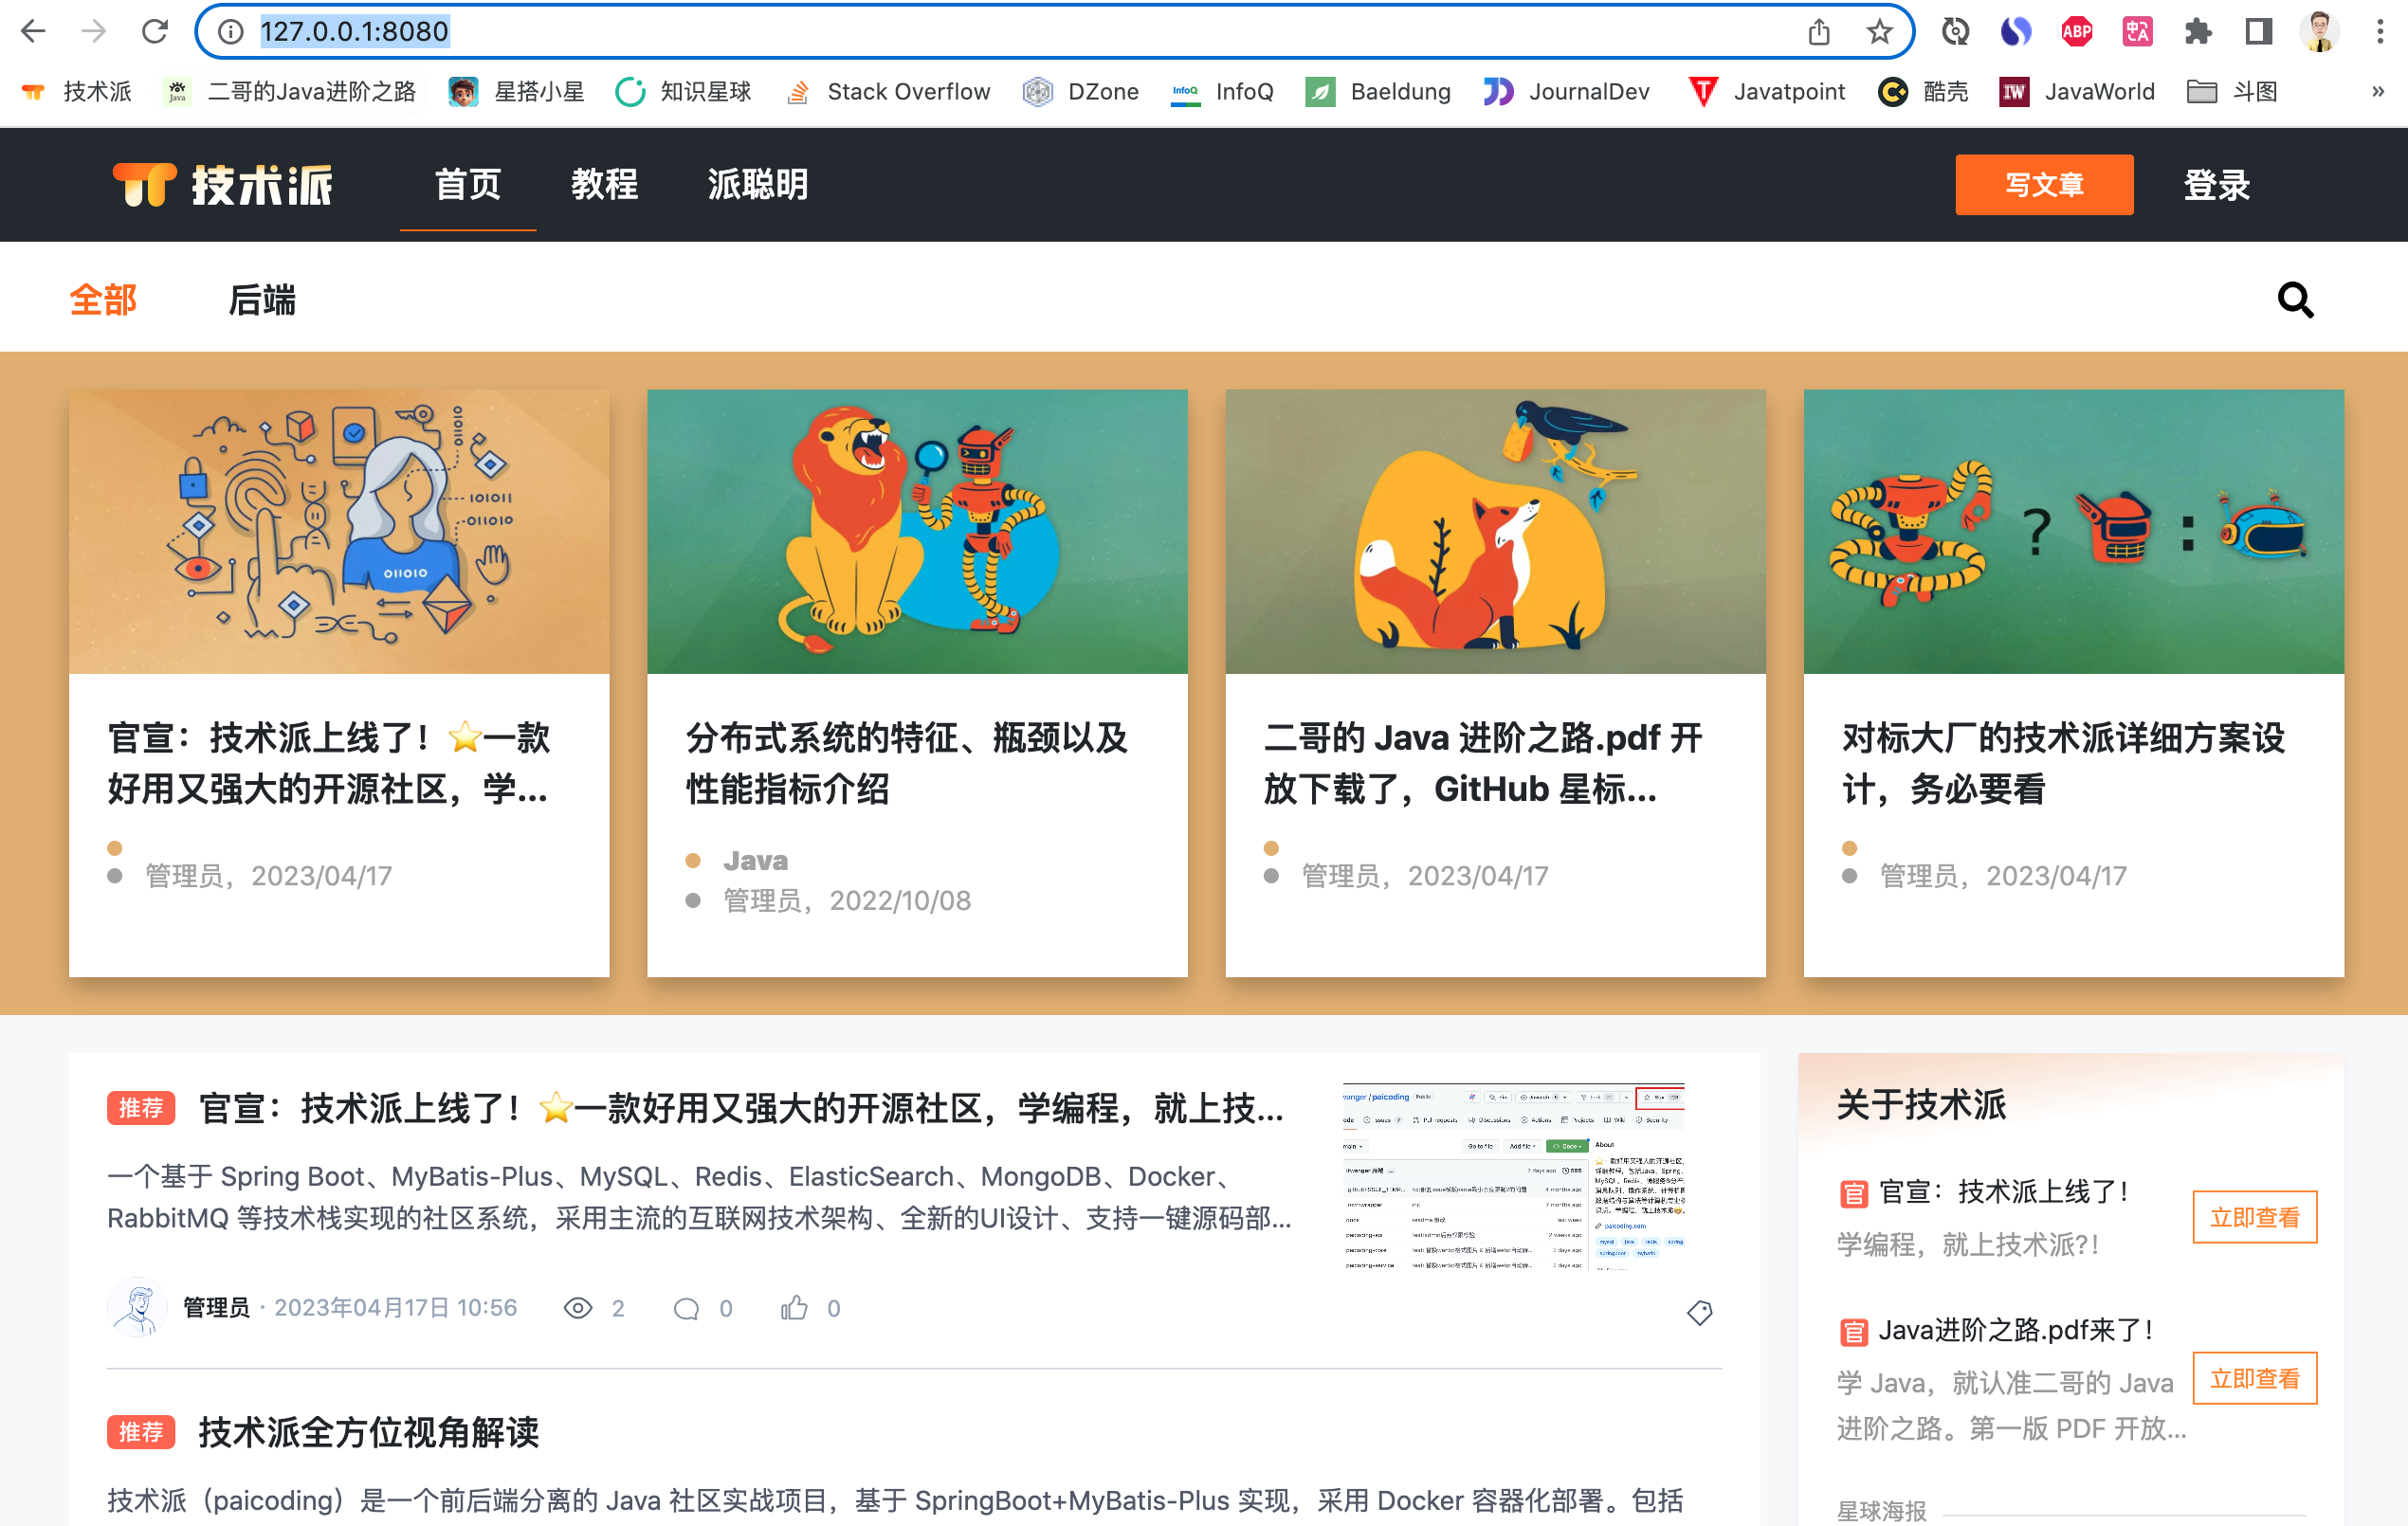
第五步,启动主类,在浏览器地址栏里输入 http://127.0.0.1:8080/ 访问首页。
Spring Boot 是如何自动装配 Thymeleaf 的?
Spring Boot 的核心功能就是自动配置,这在整合 Thymeleaf 时也不例外。当我们在项目依赖中加入 spring-boot-starter-thymeleaf 后,Spring Boot 就会自动配置 Thymeleaf。这包括创建 Thymeleaf 的模板解析器、模板引擎,以及视图解析器。
在 Spring Boot 的自动装配模块(spring-boot-autoconfigure)中,有一个名为 ThymeleafAutoConfiguration 的配置类,这个类负责 Thymeleaf 的自动配置。

大家可以扒开 ThymeleafAutoConfiguration 细致看一下,我这里帮大家梳理几个点:
①、@EnableConfigurationProperties(ThymeleafProperties.class): 启用 Thymeleaf 的配置属性类 ThymeleafProperties,这个类定义了 Thymeleaf 的各种配置项,如模板的位置、缓存策略等。

和我们前面提到的 Thymeleaf 配置项是呼应的。
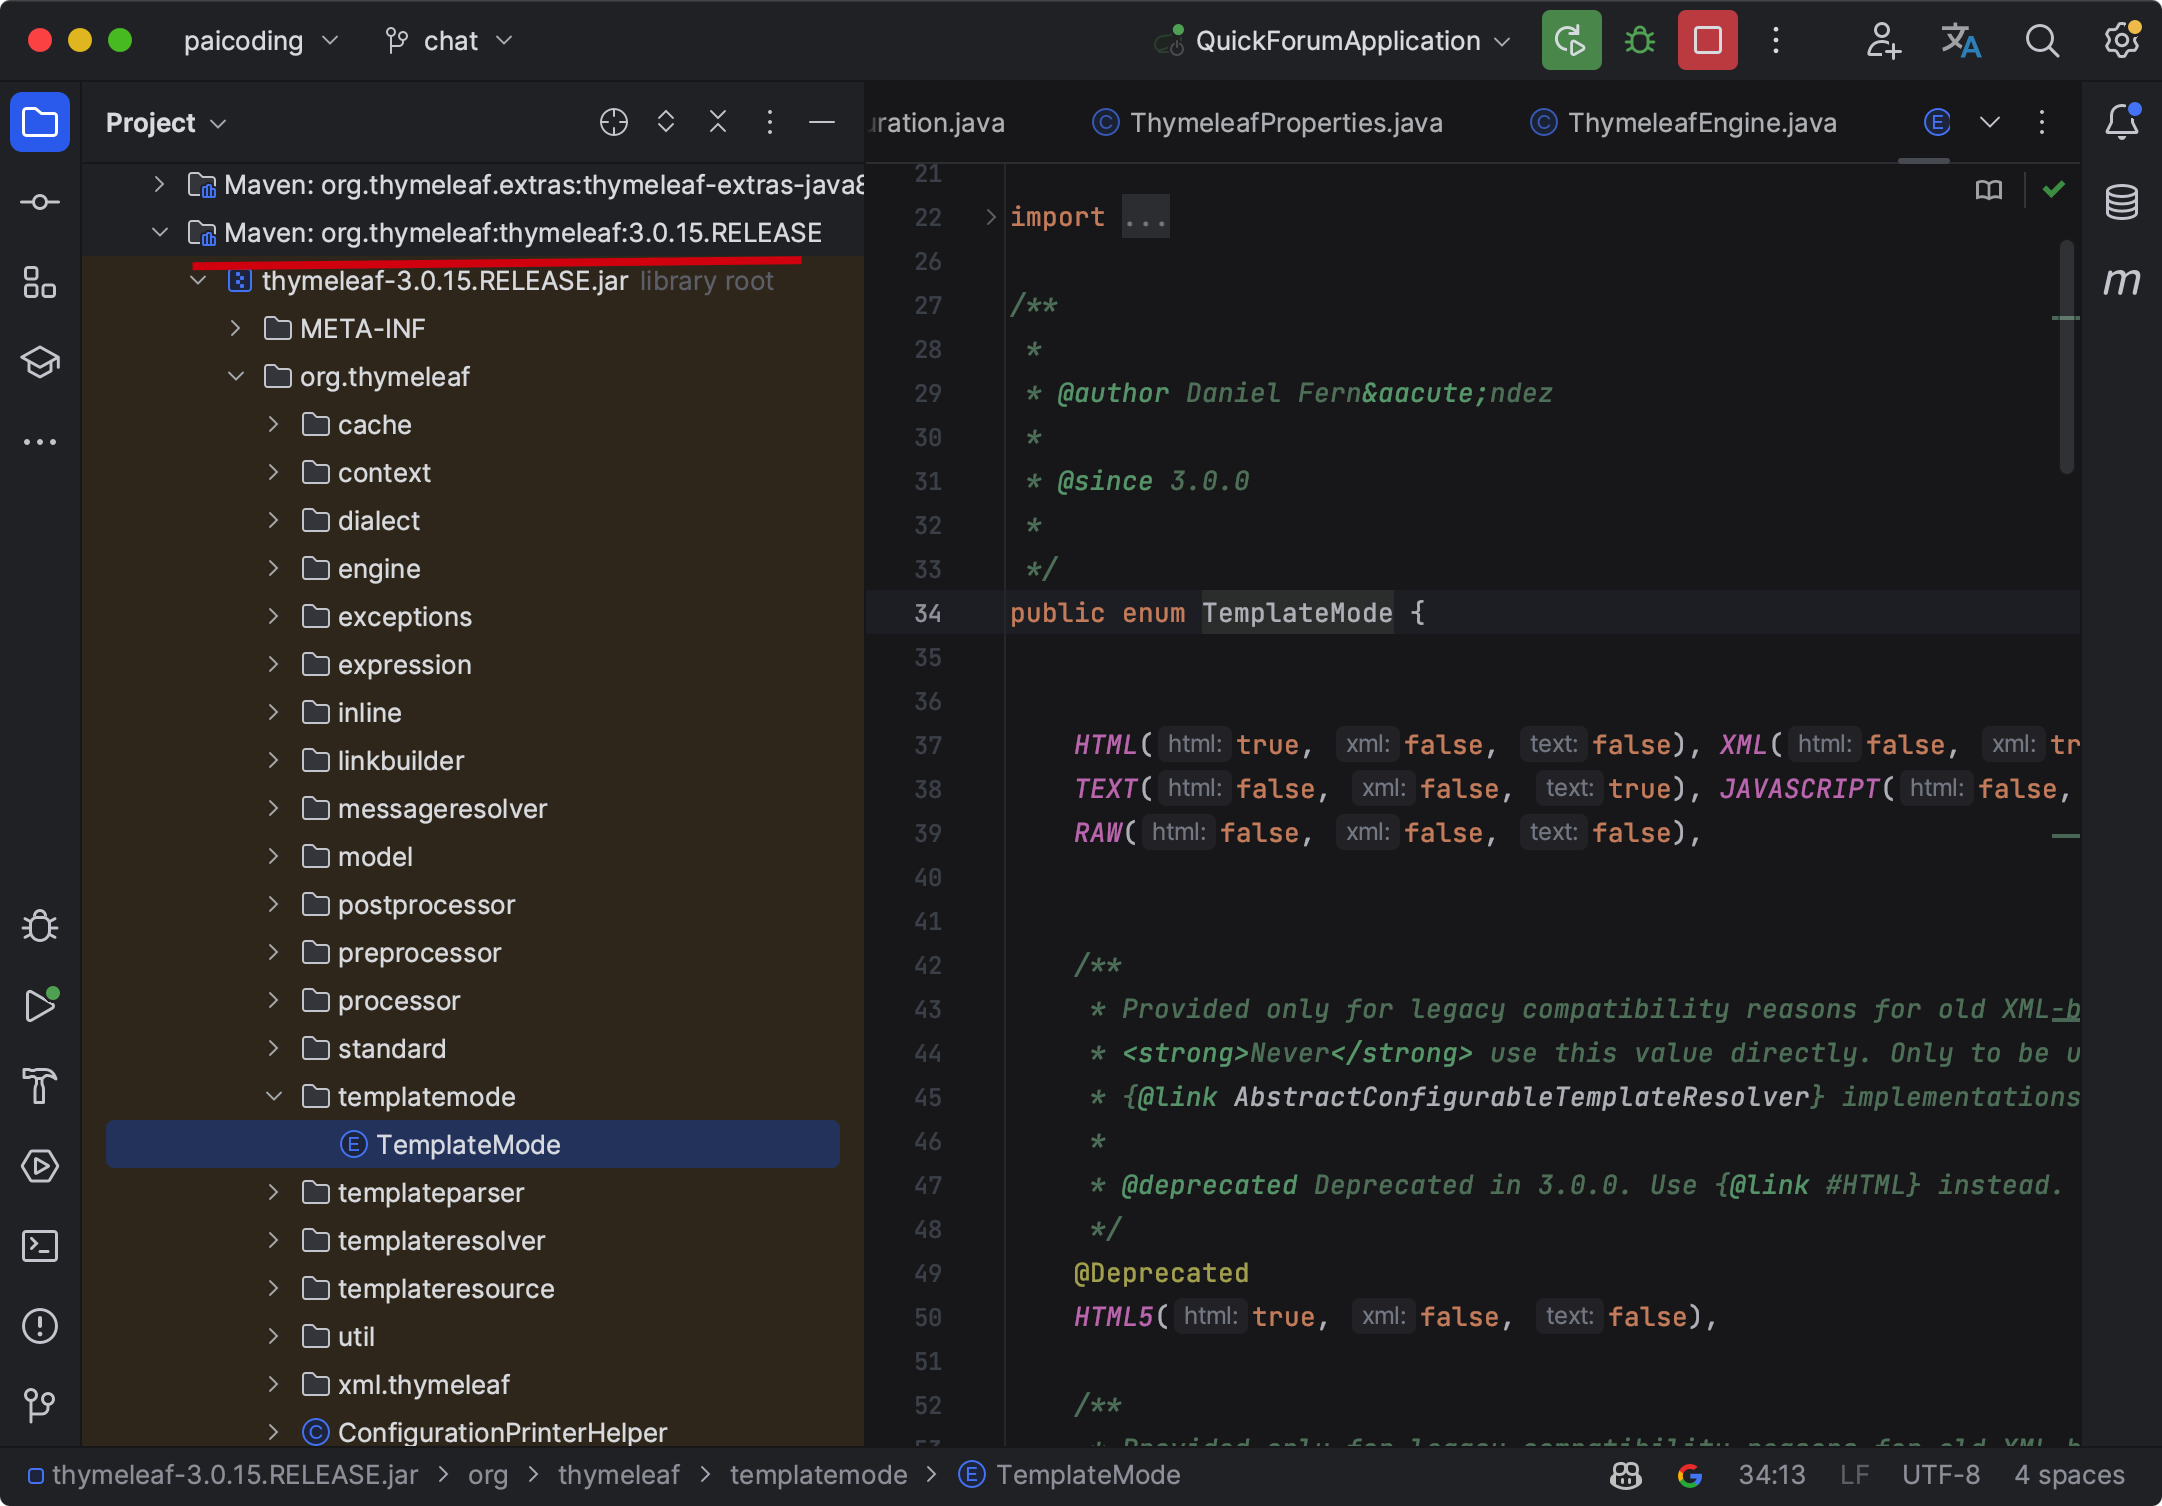
②、@ConditionalOnClass({ TemplateMode.class, SpringTemplateEngine.class }): 这个条件注解表示只有当类路径中存在 TemplateMode 类和 SpringTemplateEngine 类时,才会启用这个自动配置。
TemplateMode 是 Thymeleaf 的类。
SpringTemplateEngine 是 Spring 与 Thymeleaf 集成的类。
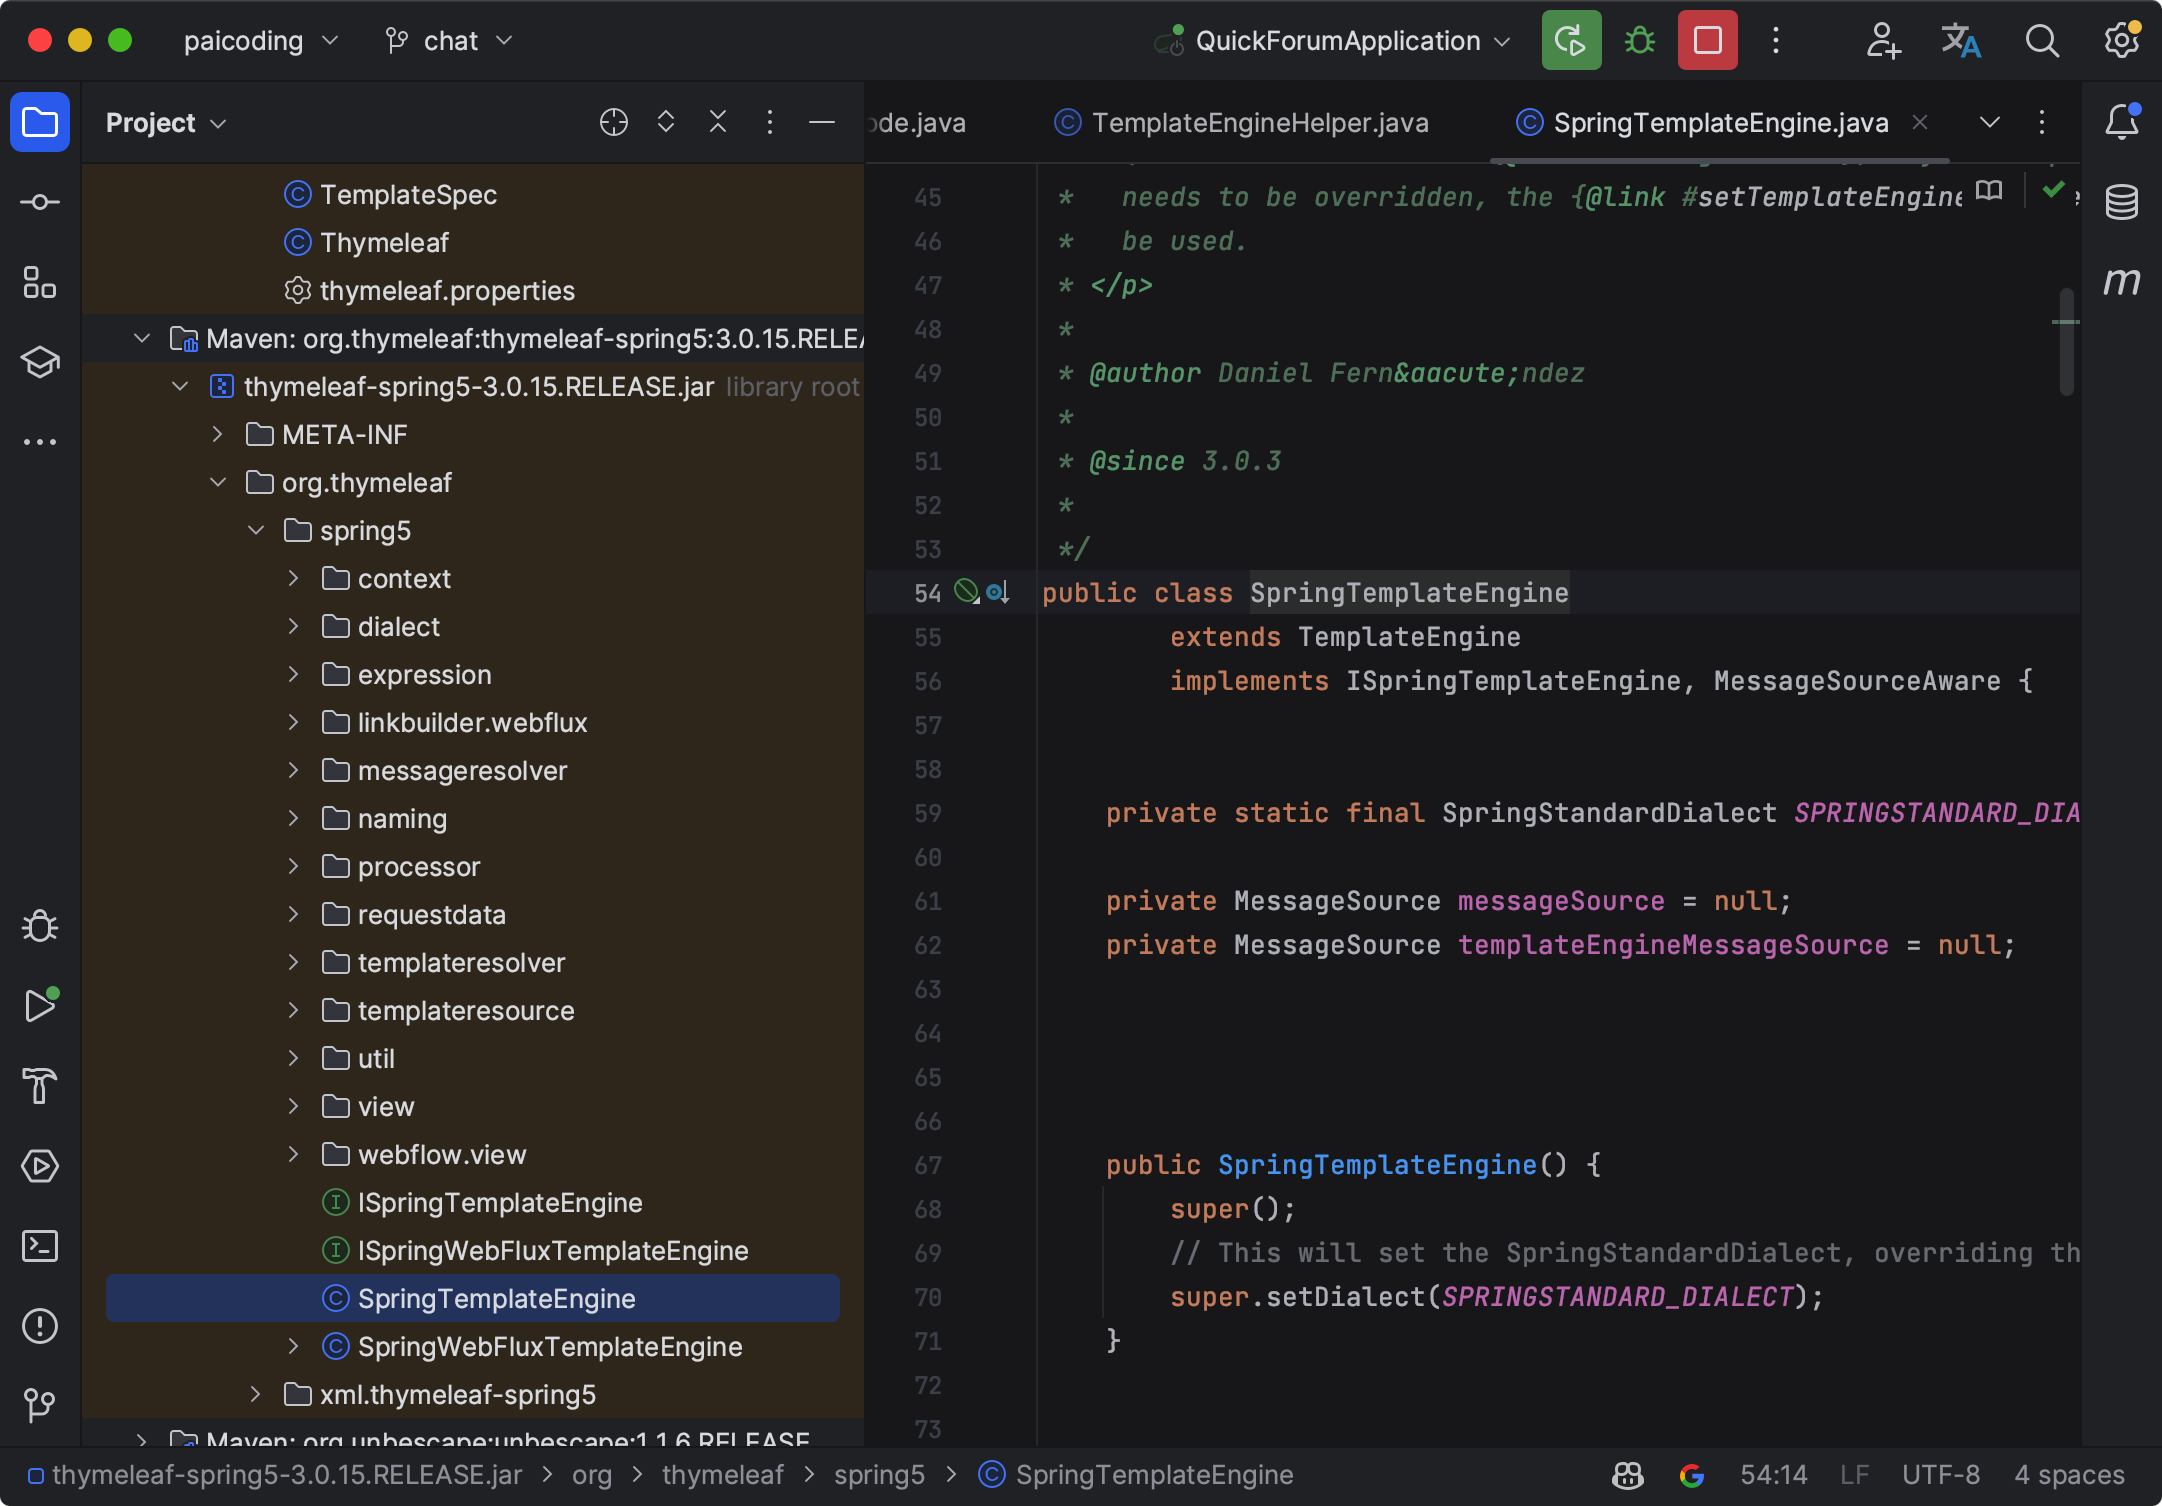
所以,这个配置类的启动条件是 Thymeleaf 和 Spring 都存在。
模版解析器
在 ThymeleafAutoConfiguration 中,有一个名为 DefaultTemplateResolverConfiguration 的内部类,这个类负责创建 Thymeleaf 的模板解析器。
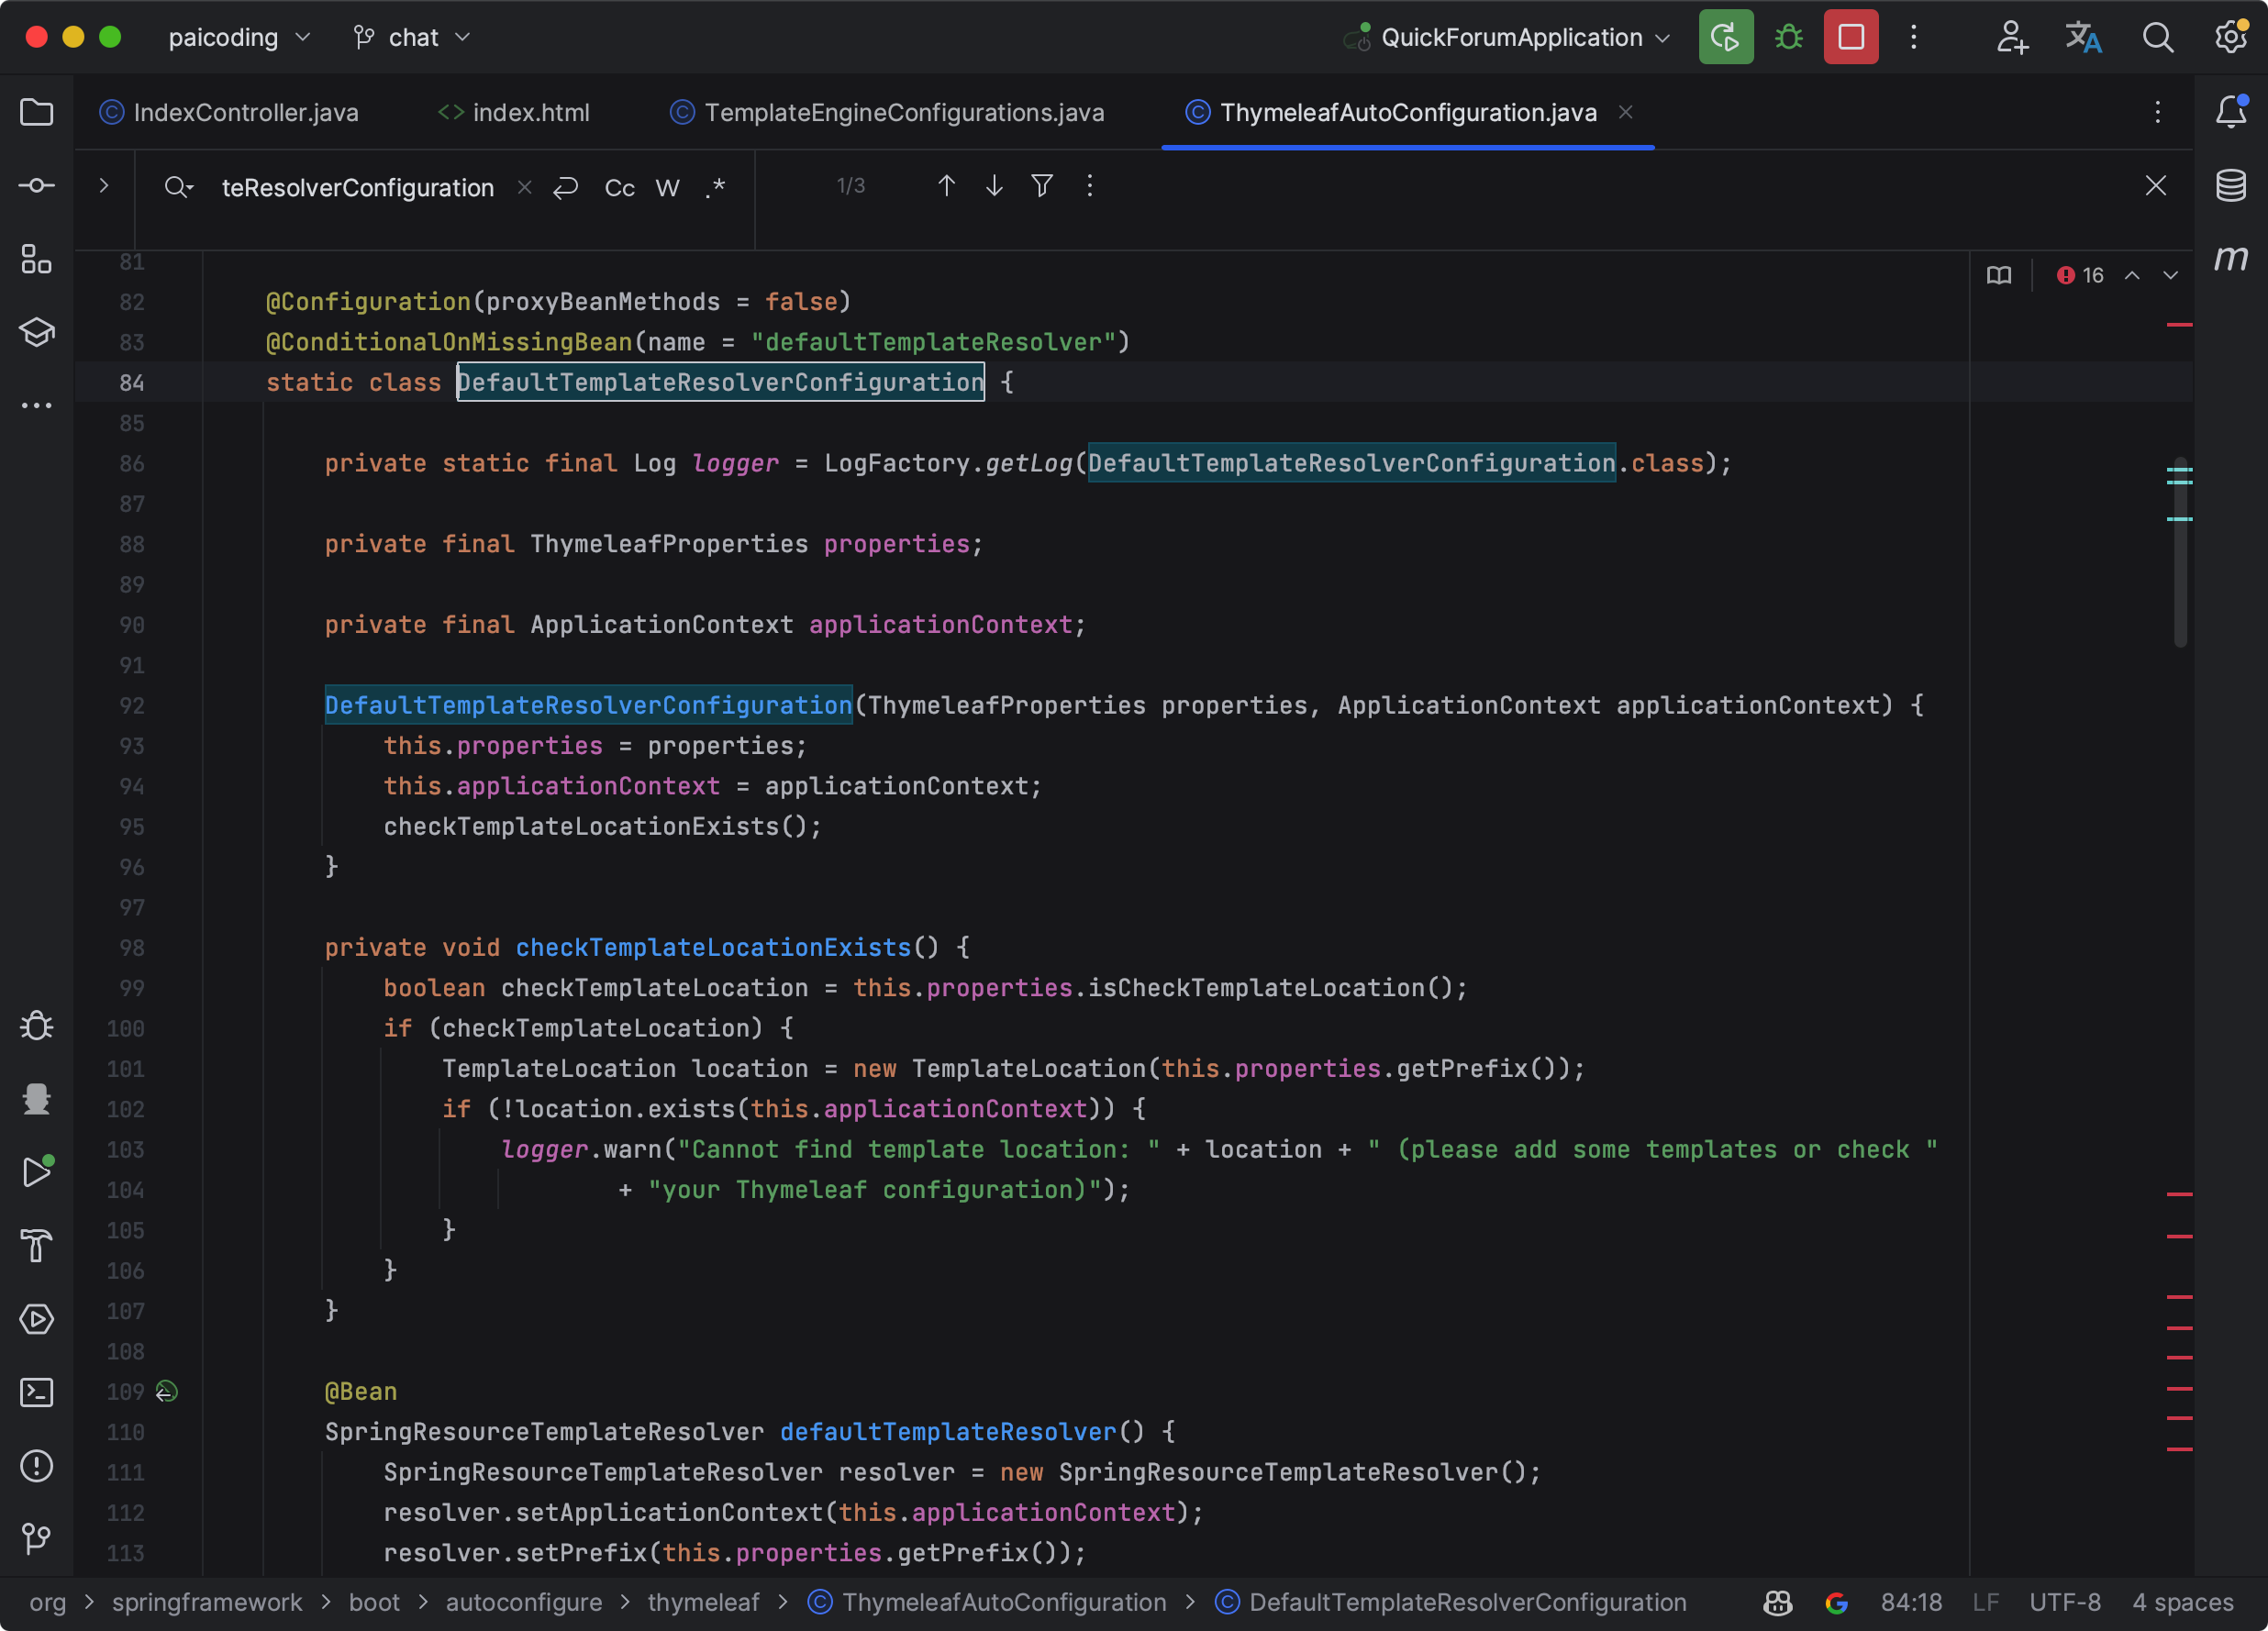
Thymeleaf 模板解析器负责解析模板文件,并将模板文件解析为 Thymeleaf 可以处理的内部结构。DefaultTemplateResolverConfiguration 模板解析器可以处理在 classpath:/templates/ 目录下的 .html 文件。
模板引擎
模板引擎是 Thymeleaf 的核心,它负责执行模板的处理和渲染。在处理模板时,模板引擎会使用表达式执行引擎对 Thymeleaf 表达式进行求值,同时还会执行所有定义的处理器。
在 Thymeleaf 中,模板引擎的核心类是 org.thymeleaf.TemplateEngine。该类负责处理模板,并产生处理结果。SpringTemplateEngine 是 TemplateEngine 的子类,比如在 ThymeleafWebMvcConfiguration 和 ThymeleafWebFluxConfiguration 类中,SpringTemplateEngine 对象会被注入到 ThymeleafViewResolver 和 ThymeleafReactiveViewResolver 中。
TemplateEngineConfigurations.DefaultTemplateEngineConfiguration 和 TemplateEngineConfigurations.ReactiveTemplateEngineConfiguration 配置类负责具体的引擎配置。

视图解析器
视图解析器的任务是将控制器方法返回的视图名解析为实际的视图对象。在 Spring Boot 自动配置的 Thymeleaf 中,视图名就是模板文件的名字。例如,视图名 "index" 对应的模板文件是 classpath:/templates/index.html。
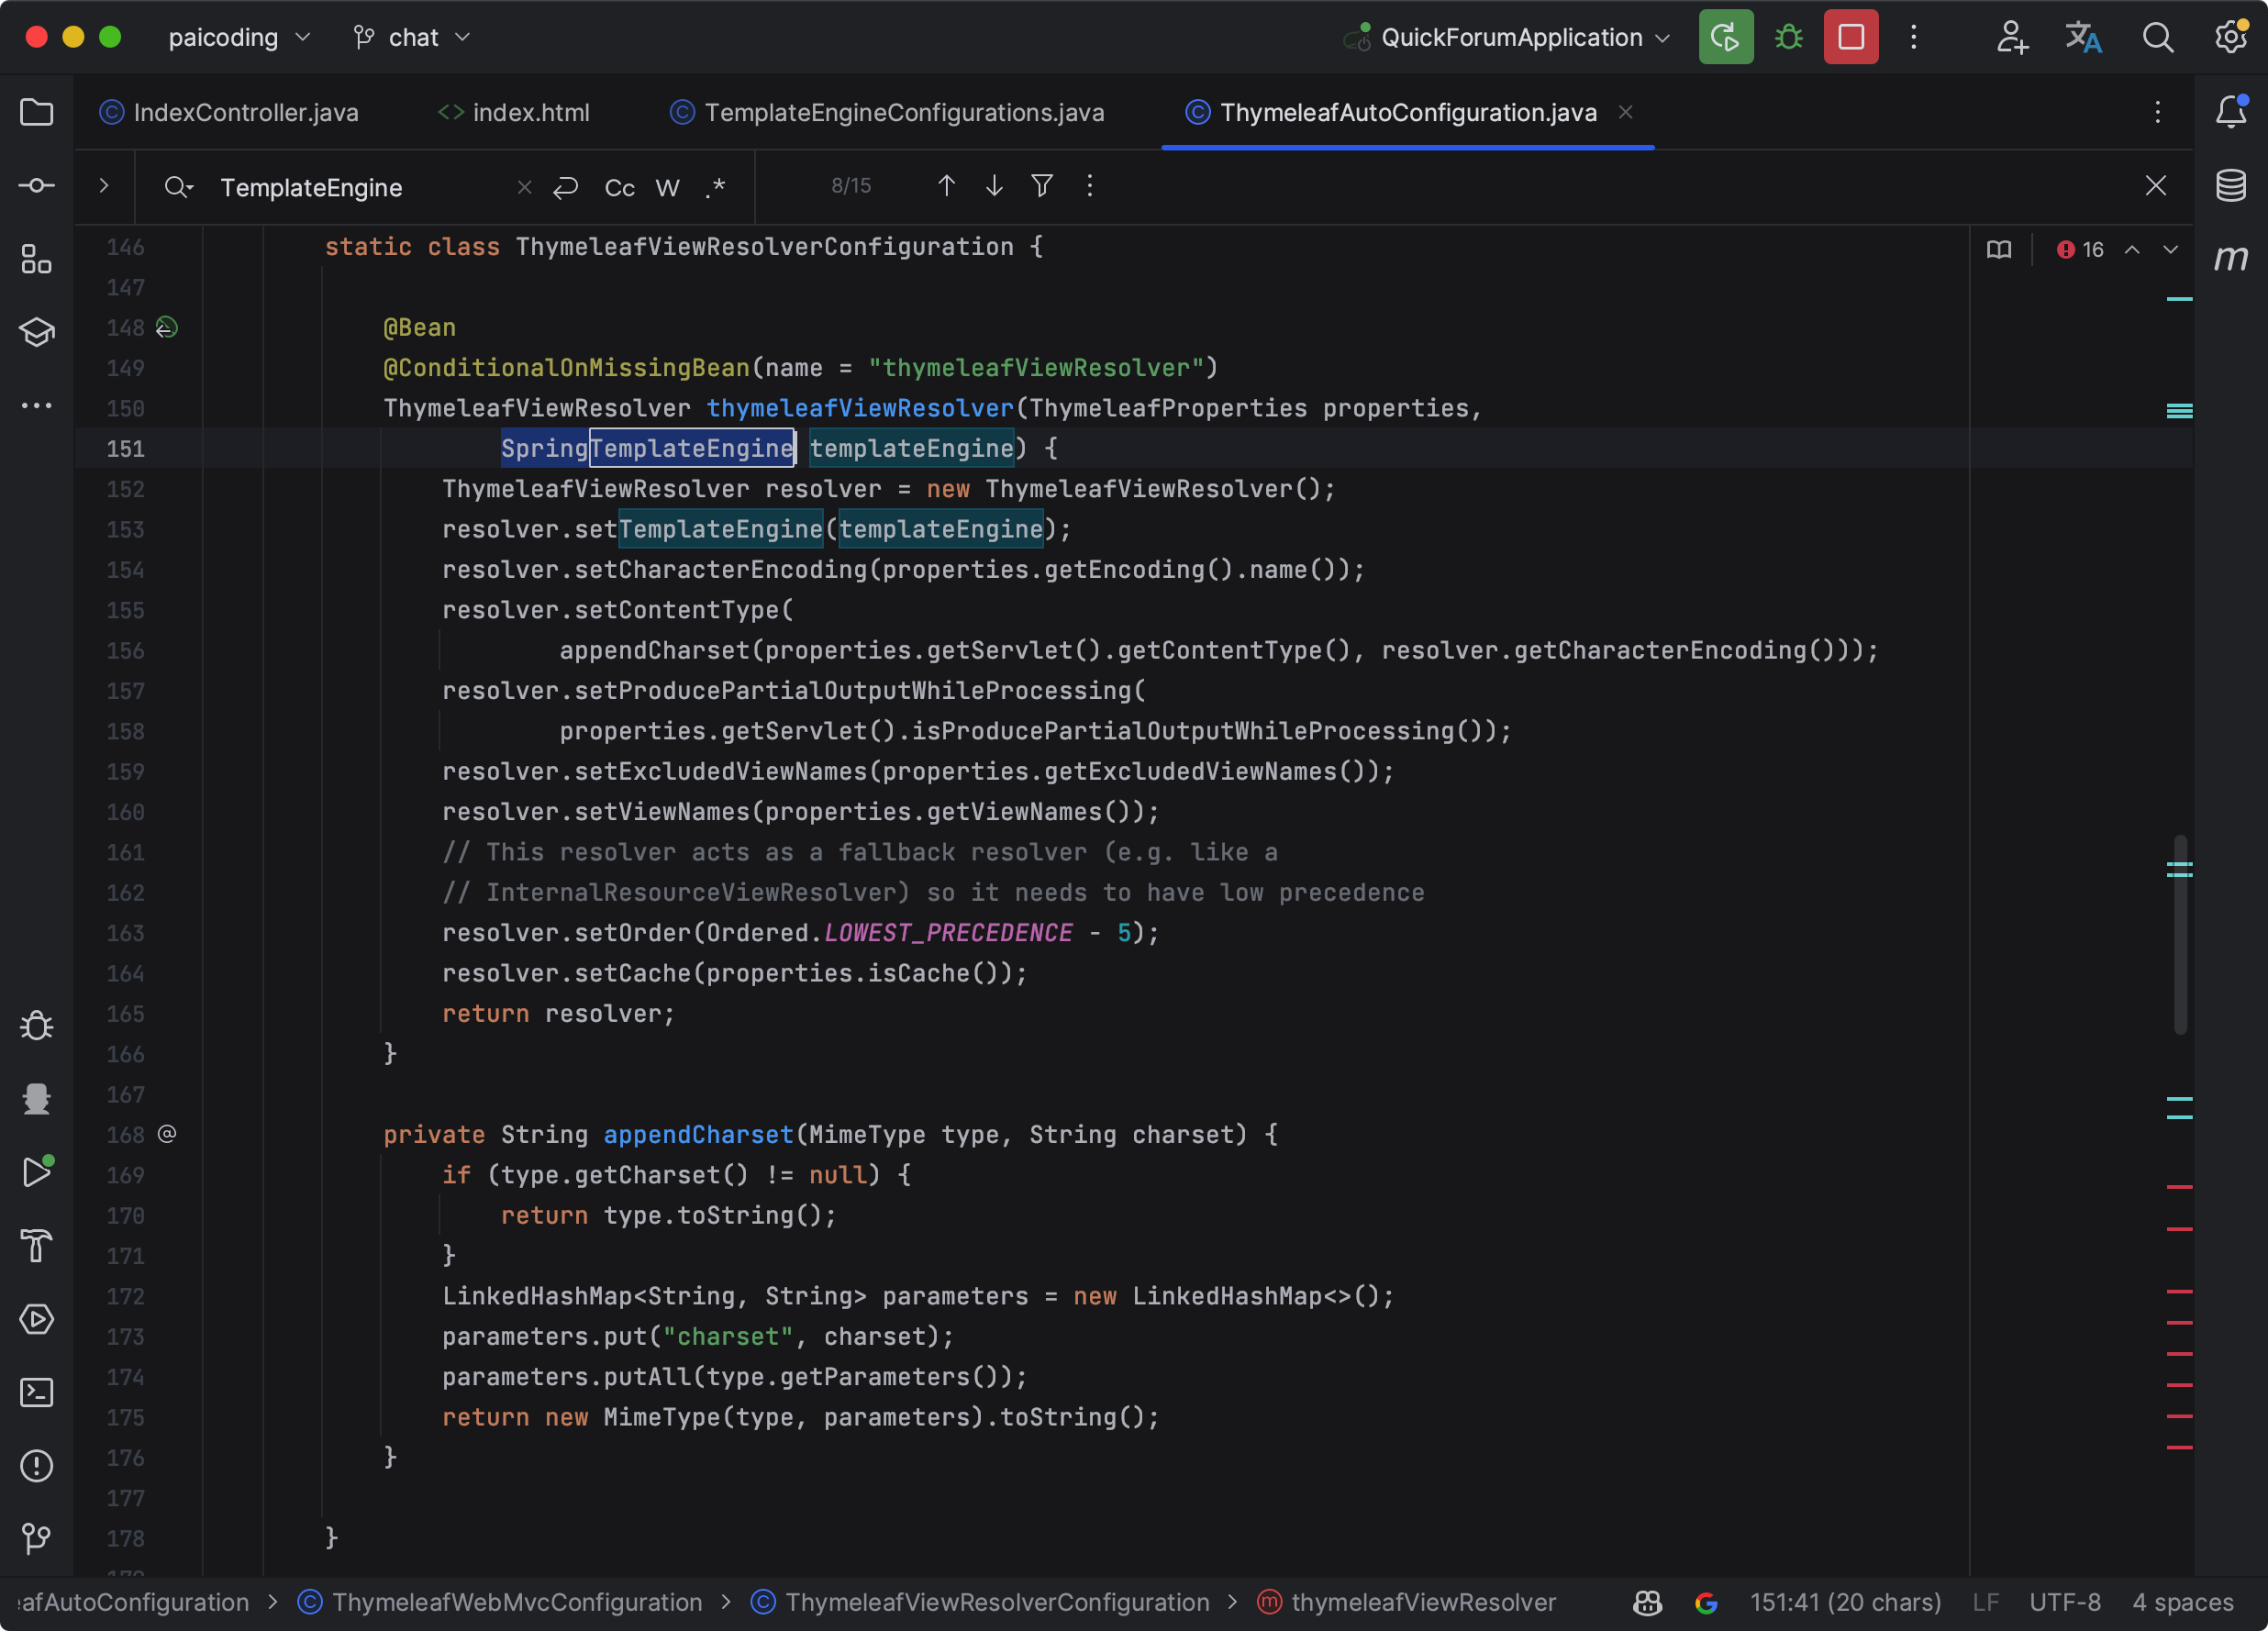
在 ThymeleafAutoConfiguration 中,有一个名为 ThymeleafWebMvcConfiguration 的内部类,它内部又有一个内部类 ThymeleafViewResolverConfiguration,这个类负责创建 Thymeleaf 的视图解析器。
@Configuration(proxyBeanMethods = false)
static class ThymeleafViewResolverConfiguration {

  @Bean
  @ConditionalOnMissingBean(name = "thymeleafViewResolver")
  ThymeleafViewResolver thymeleafViewResolver(ThymeleafProperties properties,
      SpringTemplateEngine templateEngine) {
    ThymeleafViewResolver resolver = new ThymeleafViewResolver();
    resolver.setTemplateEngine(templateEngine);
    resolver.setCharacterEncoding(properties.getEncoding().name());
    resolver.setContentType(
        appendCharset(properties.getServlet().getContentType(), resolver.getCharacterEncoding()));
    resolver.setProducePartialOutputWhileProcessing(
        properties.getServlet().isProducePartialOutputWhileProcessing());
    resolver.setExcludedViewNames(properties.getExcludedViewNames());
    resolver.setViewNames(properties.getViewNames());
    // This resolver acts as a fallback resolver (e.g. like a
    // InternalResourceViewResolver) so it needs to have low precedence
    resolver.setOrder(Ordered.LOWEST_PRECEDENCE - 5);
    resolver.setCache(properties.isCache());
    return resolver;
  }
}
简单总结一下,Spring Boot通过ThymeleafAutoConfiguration类来自动装配Thymeleaf。该类定义了许多Bean(如SpringTemplateEngine,ThymeleafViewResolver等),并使用条件注解(如@ConditionalOnClass,@ConditionalOnMissingBean等)来实现条件装配。由于使用了@EnableConfigurationProperties(ThymeleafProperties.class)注解来注入和读取Thymeleaf相关属性,所以我们可以在 application.yml 中自定义 Thymeleaf 的配置项。
如何将后端数据返回给 Thymeleaf 呢?
理解了 Thymeleaf 的自动装配机制后,我们再来思考一个问题:如果我们想把后端的数据传回给 Thymeleaf,该怎么办呢?
其实也简单,我们可以通过 Model 的 addAttribute 方法来完成,比如说 model.addAttribute("vo", vo);。

这样就能将数据传回给 Thymeleaf 了。那 Thymeleaf 页面中如何取出这些数据呢?
在 HTML 中,可以通过 ${vo.xxxx} 的方式。
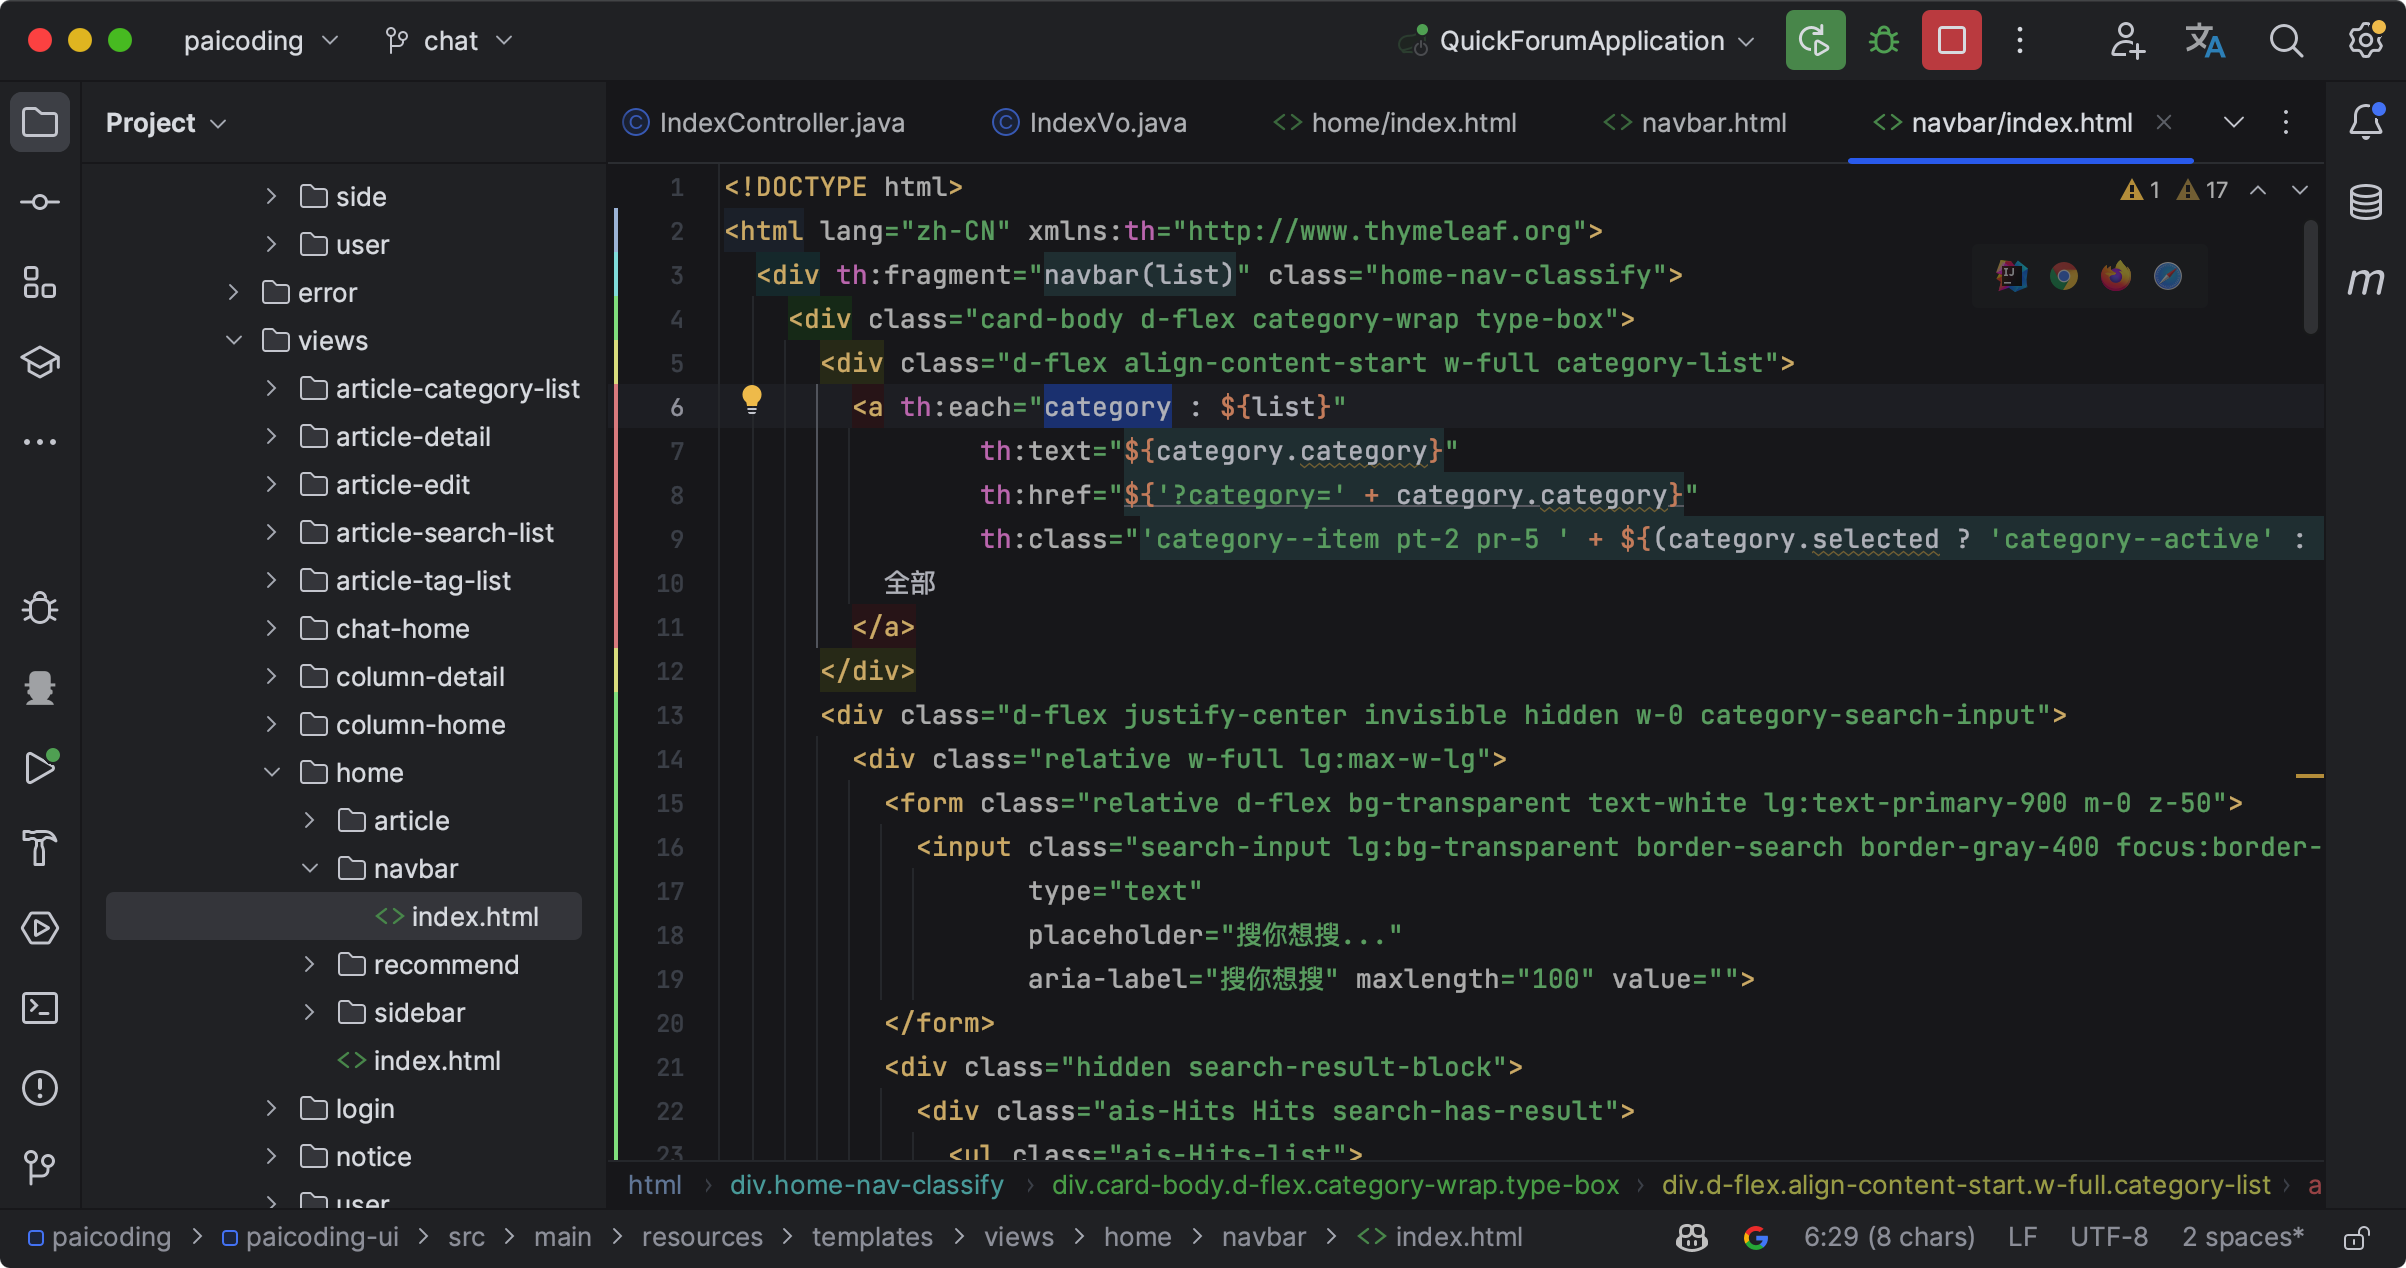
<div
  th:replace="views/home/navbar/index :: navbar(${vo.categories})"
></div>
这一行代码表示,用模板文件views/home/navbar/index中定义的navbar元素(可能是一个HTML的片段或整个元素)替换当前div标签。${vo.categories}表示传递给navbar元素的参数。在模板文件views/home/navbar/index中,这个参数可以使用Thymeleaf的表达式访问。
在 JavaScript 中,可以通过 const archiveId = [[${vo.yyyy}]] 的方式。
<script th:inline="javascript">
  const archiveId = [[${vo.categoryId}]]
  const category = [[${ vo.currentCategory }]]
  const params = {
      "category": category ? category : '全部',
      "page": 2
  }
</script>
[[${vo.categoryId}]]是Thymeleaf的内联表达式,这表示在服务器端渲染页面时,这个表达式会被${vo.categoryId}的值替代。
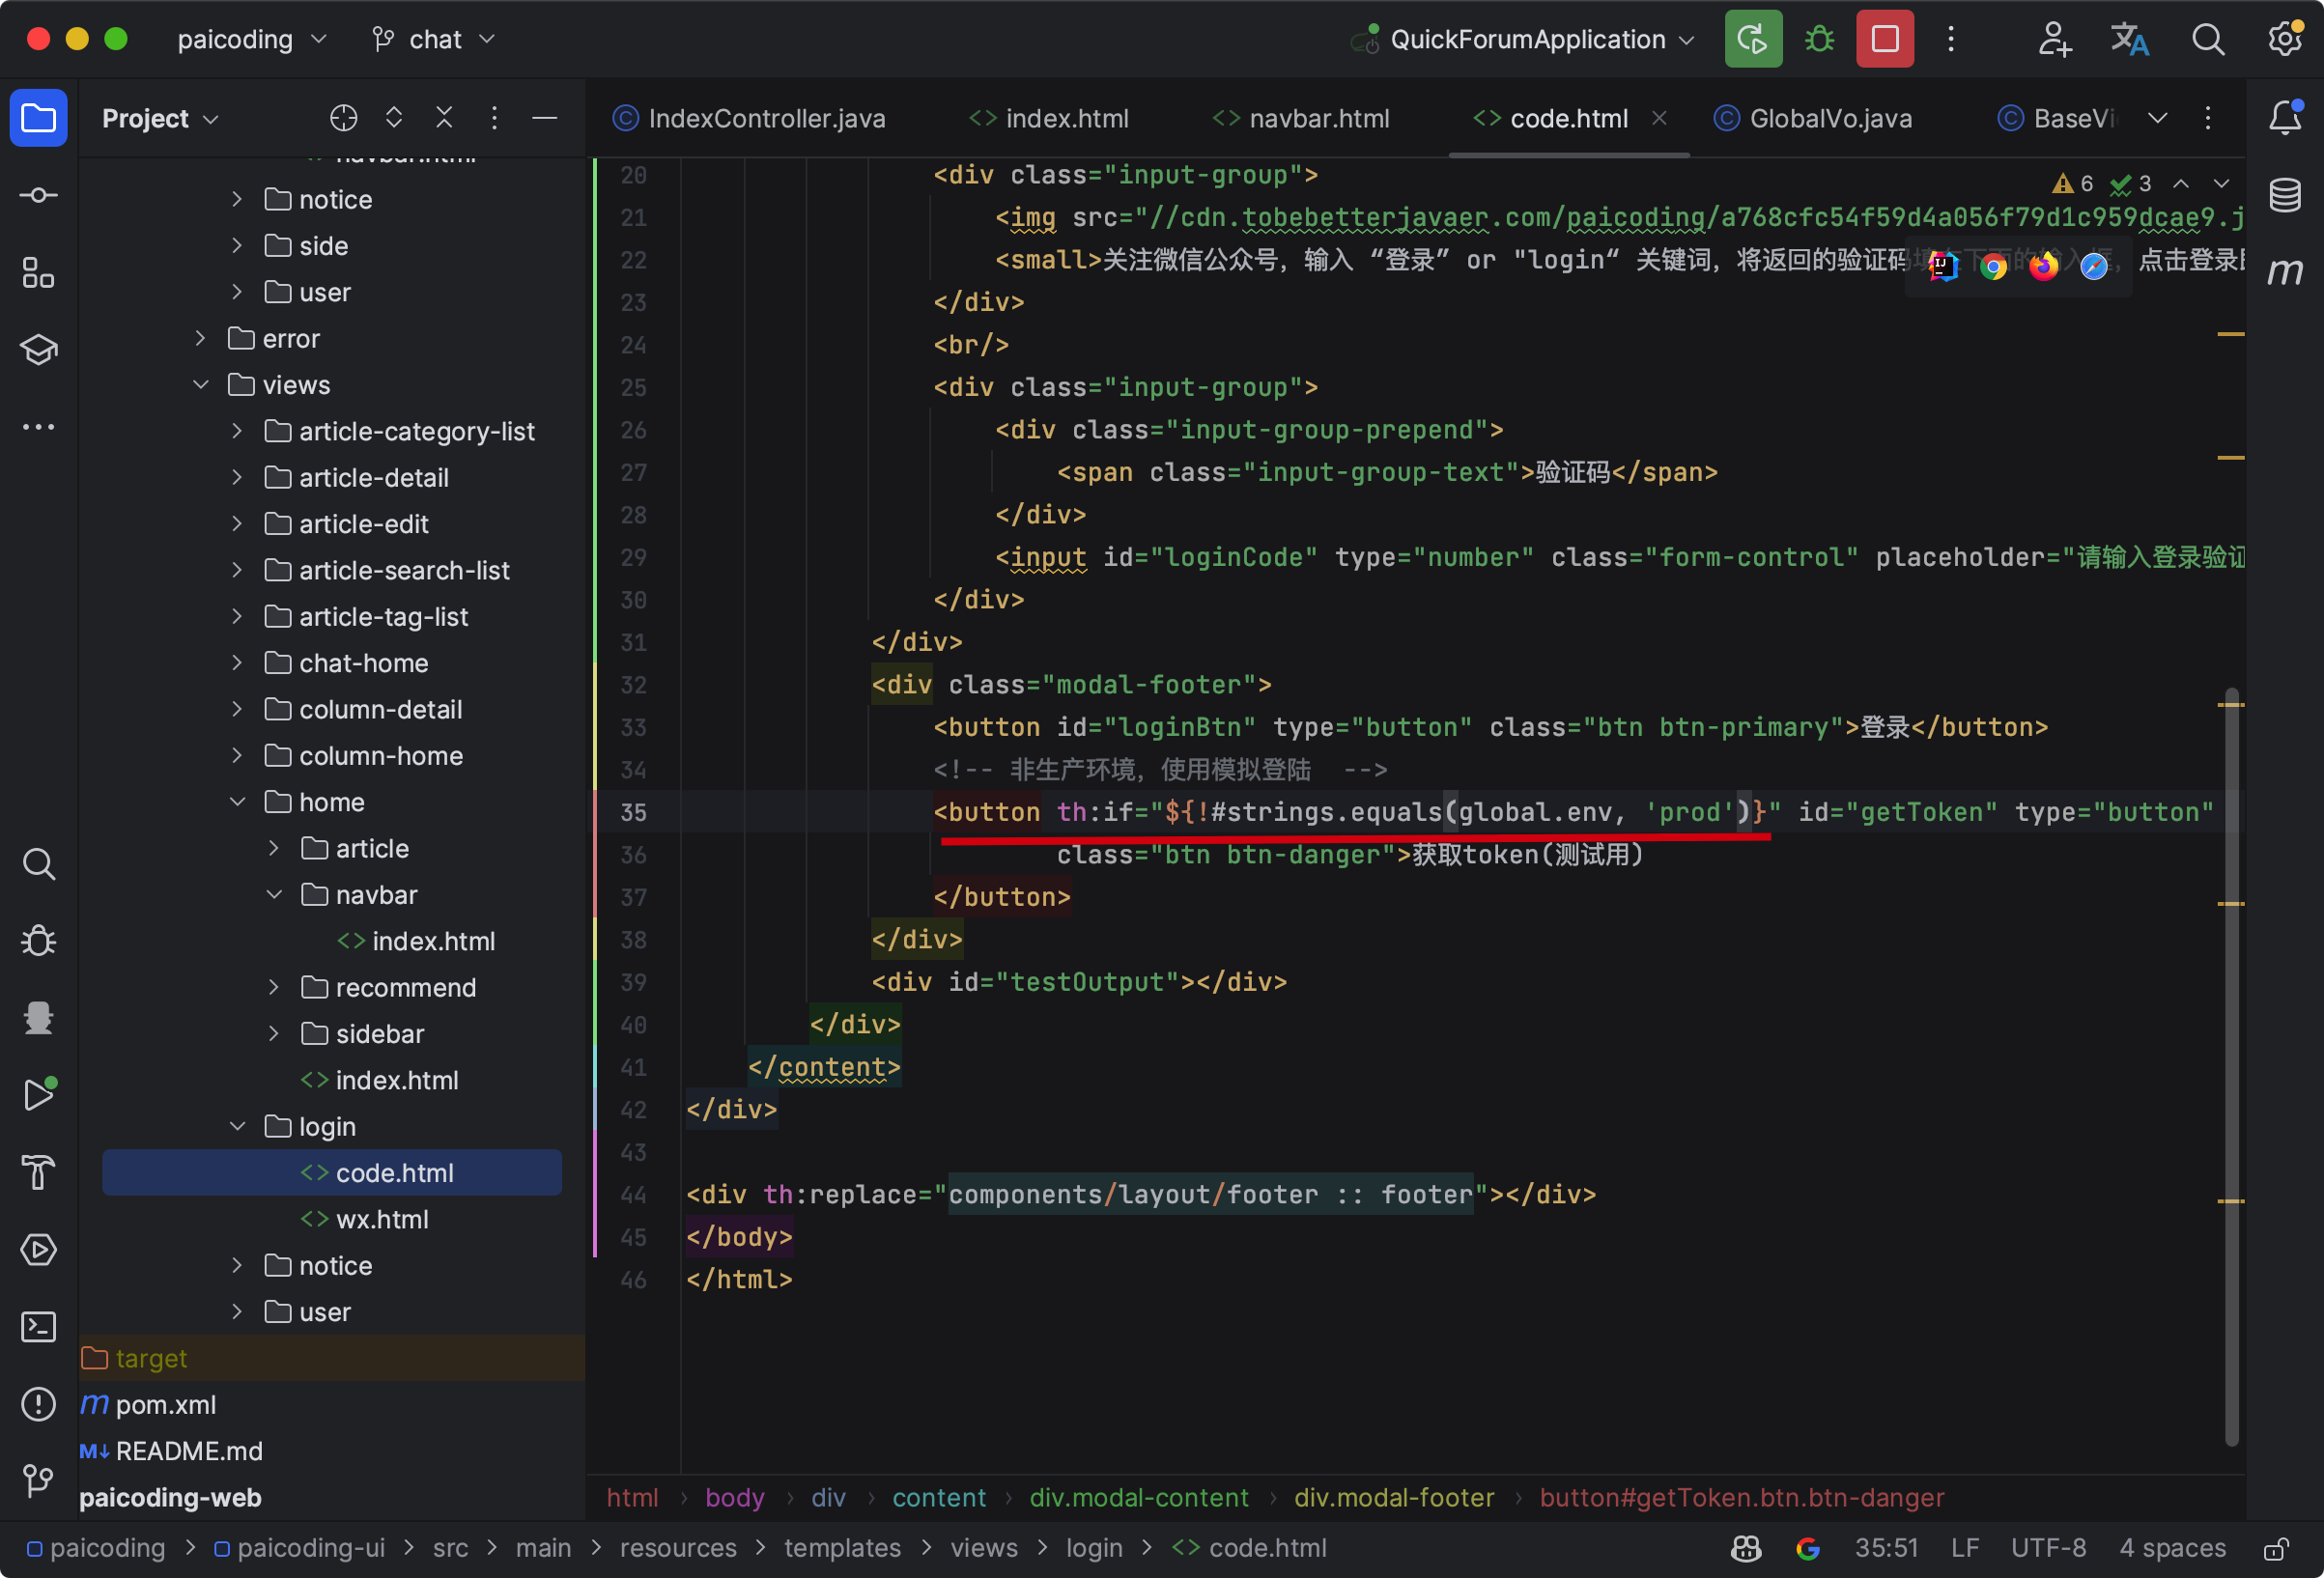
那如果是一些公共的属性,针对所有页面的全局信息,该怎么办呢?
我们可以通过全局拦截器的方式,GlobalViewInterceptor 中的 postHandle(这个方法在请求处理完成后,但在视图渲染之前执行)来完成。

通过 modelAndView.getModel().put("global", globalInitService.globalAttr()); 来往视图中增加一些全局信息。
比如说把开发环境、测试环境还是生产环境放进来,然后通过 ${global.env} 的方式访问。
小结
Spring Boot通过自动配置(Auto-configuration)可以轻松整合了Thymeleaf模板引擎。
只需要在项目中添加Spring Boot Thymeleaf Starter依赖,就能启用Thymeleaf的自动配置,该过程在ThymeleafAutoConfiguration类中实现。
自动配置会创建必要的SpringTemplateEngine,ThymeleafViewResolver等Bean。
在application.yml中,可以对Thymeleaf进行个性化配置,如模板的前缀和后缀,缓存策略等。
在Controller层,我们可以使用Model对象将数据传递到Thymeleaf中,并在模板中利用Thymeleaf的各种标签(如th:text,th:if等)进行数据渲染和交互逻辑处理。
如果需要一些全局信息,则可以通过拦截器来完成。
以上,希望大家都能认真实操一遍,尤其是 Thymeleaf 的自动装配和全局信息这里,你会学到很多。


热门评论
1 条评论
回复